If your air rifle is mysteriously losing pressure when not in use, it may have an air leak. Air leaks in air rifles are actually quite common, and knowing how to detect and fix air leaks in your air rifle is important.
In this article, we are going to look at how to fix air rifle leaks. We will also discuss the symptoms of an air leak in a PCP rifle.
Air Rifle Leak Signs
Hunting squirrels with an air rifle is fun. However, if the air rifle is not properly sealed, it can leak air and can decrease the pellets speed and accuracy, resulting in misses. Also, air leaks in the air rifle lead to faster and permanent damage to the pneumatic components.
Before fixing the problem, though, we need to first know how to diagnose it. There are several signs that can alert you to the presence of an air leak in your air rifle.
Air Rifle Not Holding Pressure:
The first and perhaps most obvious is air loss when the rifle is not in use. If you pump your rifle full with air and then after two or so days, it shows it has lost half of its air, an air leak inside the rifle may be to blame.
Pellets not being as fast: Due to the air leak, your air rifle will not have enough pressure to fire pellets at the velocity you are used to. So if you notice that the pellets are being ejected rather slowly, check to see if the rifle is leaking air.
Hissing Noise From The Rifle:
Escaping air produces a high-frequency hissing sound that may be difficult to detect. However, sometimes you may hear a slight hissing noise from your rifle. It may be from an air leak if you hear such a noise.
Common Air Rifle Leak Problems
One of the main problems associated with an air rifle leak is the rifle not holding pressure. When you pump air into it, the air rifle will not stay pumped for long. This is usually because of an air leak in the seal.
Another problem is pellets not being as fast and accurate. The loss of pressure will affect the velocity of the air rifle and make your pellets travel slower than usual. You will also notice a dip in accuracy, caused by the unexpected pressure loss.
Common Areas Where Air Leaks Can Occur
- The first area is the front, where the filler is. An air leak in the filler valve will be noticeable by air coming back out of the filler or the valve.
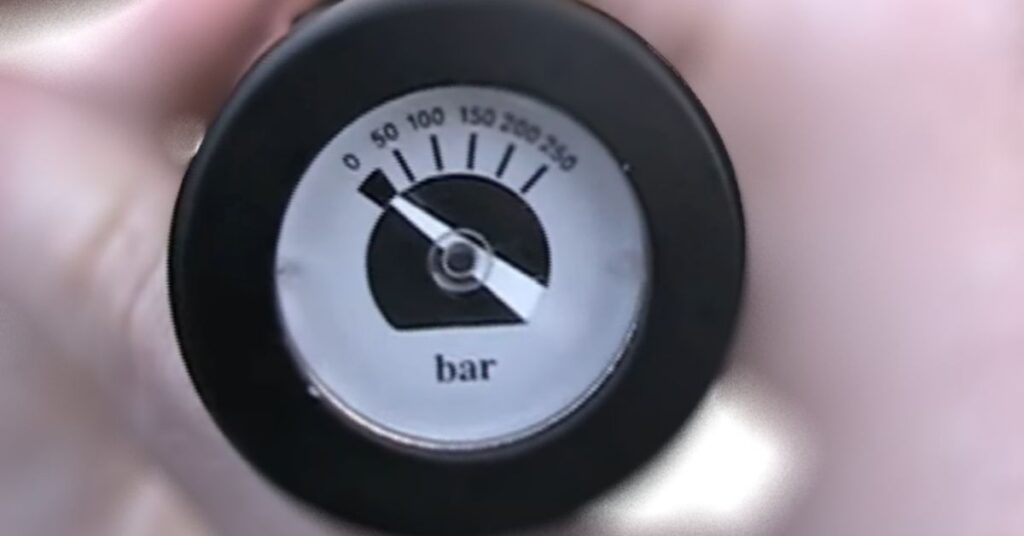
- The pressure gauge is the other area to check for air leaks. A leak in this area will show by air coming out of the main pressure gauge area.
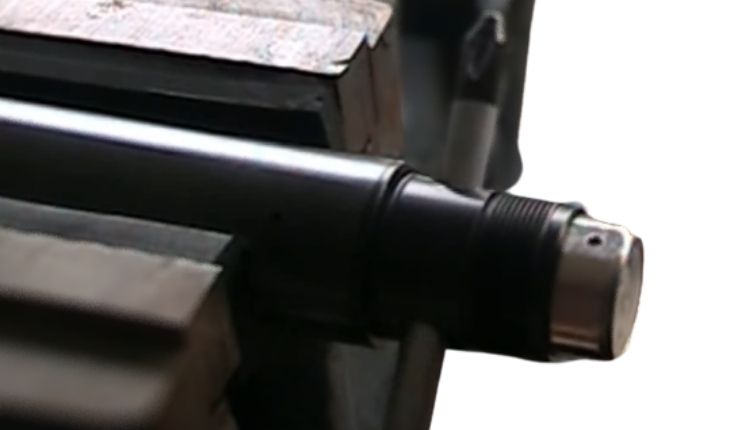
- Lastly is the main valve assembly, and a leak in this area will show by air escaping through the rifle’s barrel.
Now that we know how to diagnose the problems, now let’s take a look at how to fix an air leak on a PCP air rifle.
How To Find Air Leaks
If you suspect your air rifle has a leak, the next thing to do is to try and find the source of the leak.
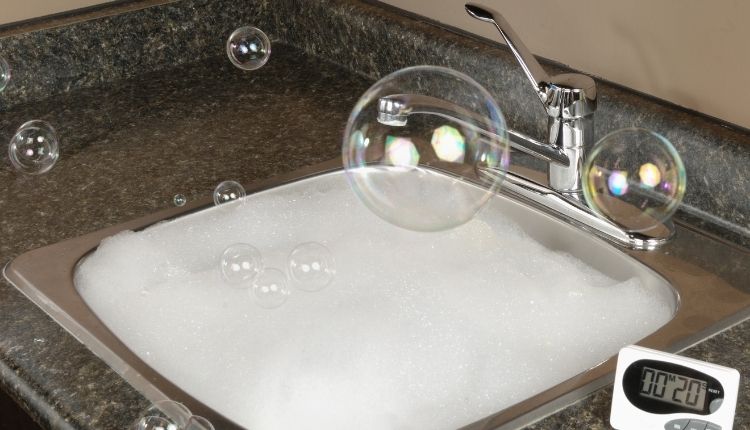
Using Soapy Water
There are several ways of finding the air leaks. First is the more traditional way of using soapy water. Add dishwashing liquid into a glass of water and apply the soapy mixture to the areas you suspect an air leak. You can do this in all the three areas we have highlighted above.
An air leak will cause bubbles to form. Therefore if you see bubbles forming in the solution, there is an air leak.
Muzzle Test
For this test, wipe a film of soapy water across the rifle’s muzzle. If the exhaust side of the valve is leaking, the muzzle will blow bubbles. Alternatively, dip the muzzle in a full water basin if you are in a hurry. An air leak in the valve will cause the muzzle to blow bubbles.
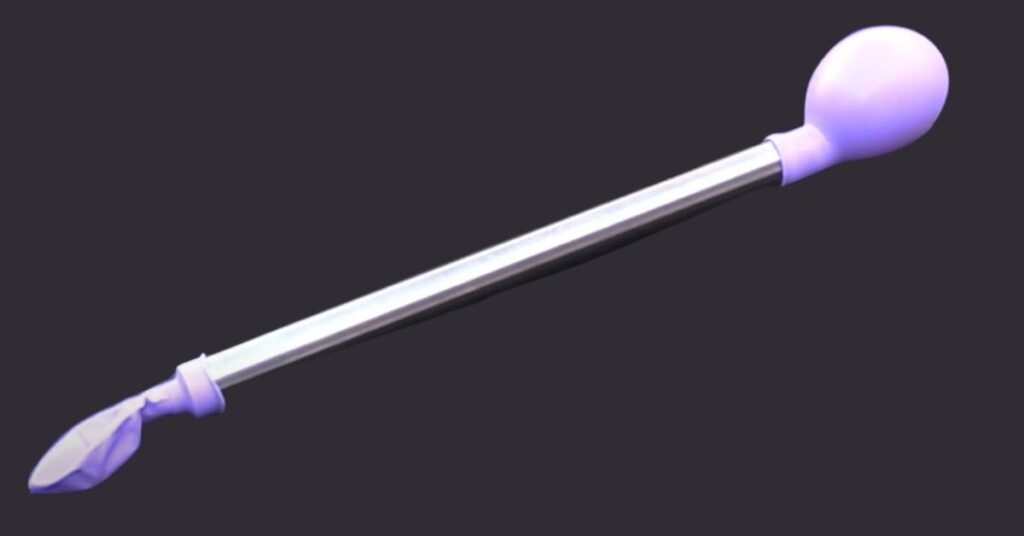
The Balloons Test
If you are nervous about applying water to your rifle, a safer way of testing is using balloons. To perform this test, remove the cylinder from the rifle and put a balloon over the muzzle end. Then pump air into the cylinder to about 50 bars.
Then put another balloon on the pressure gauge end. If the balloon on the pressure gauge end inflates overnight, it may be a leak in the filling valve or O-ring. If the one on the muzzle end inflates them, it may be a leak in the firing pressure release.
How To Fix Air Rifle Leak: 8 Easy Peasy Steps To Follow
Step One: Make Sure The Gun Is Not Loaded.
The first thing you need to do before anything else ensures the gun is not loaded. This is to avoid any accidents while fixing it.
Step Two: Remove The Air Cylinder, rifle scope and Suppressor
The next thing to do is to remove the rifle’s air cylinder. However, before doing that, you need to first remove the air rifle scope and suppressor. Removing the suppressor will allow the cylinder to slide out easily.
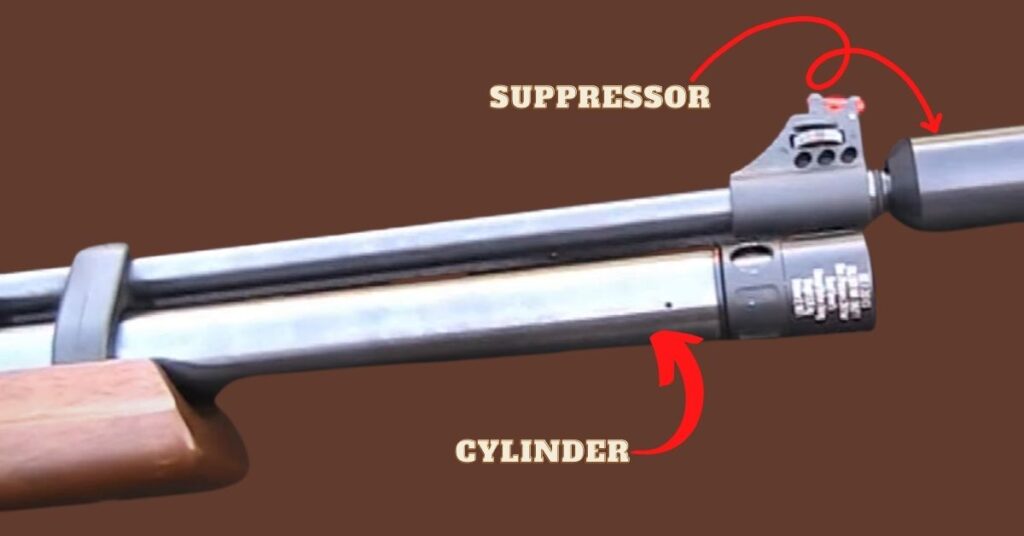
Once the suppressor is off, twist the air cylinder and slide it out. Once the cylinder is out, check the pressure gauge to ensure it is empty. It is advisable to work with the cylinder when it’s empty.
Step Three: Check For Air Leaks.
Next, it is time to check for air leaks on the cylinder. For this part, we are going to use the balloon test. Take a balloon and slide it over the pressure valve side of the cylinder. Be careful; the balloon may be torn when you wear it on the cylinder.
Next, you need to add air into the cylinder. Use a scuba tank for this step if the cylinder is completely empty. The valve that keeps the air in requires pressure to keep it closed. Using a pump may not get enough air into the cylinder to generate enough pressure for the valve.
Once you have put air in, put another balloon on the pressure gauge end of the cylinder. Wait to see which balloon fills up, as that will be the end of the leakage. It will also mean the air leak is not in another part of the gun.
You can also dip the two ends of the cylinder in soapy water and check for bubbles. Also, it is possible in some cases to hear the air leaking. Most PCP rifles can get air leaks on the pressure gauge due to using a pump instead of a tank.
Step Four: Empty The Cylinder
For the next steps, if you are not sure or comfortable taking apart your air rifle, we advise taking it to a professional gunsmith. Also, remember as you are dealing with high-pressure air, it is very easy to hurt yourself or damage your weapon. If you are okay continuing, the next step will be to remove the air from the cylinder.
You can wait for the air to empty, but a better way is to use the discharging valve that came with the rifle. Screw it tightly onto the pressure valve side of the rifle. Then use an Allen key to turn the black screw out of the discharge valve.
The air will come out of the small hole on the side of the discharge valve, and you should hear the air coming out. Check the air gauge to see if it is empty.
Step Five: Disassemble The Pressure Gauge
Remove the pressure cap that we put before on the pressure gauge. Next, unscrew the protective cap and cover at end of the cylinder around the gauge.
Then remove the entire gauge assembly. It may not be easy to remove the pressure gauge, and you will need a device with rubber padded sides.
Put a smooth metal pole such as a screwdriver through the hole on the pressure gauge and turn. When the pressure gauge becomes loose enough, you can turn it by hand to remove it.
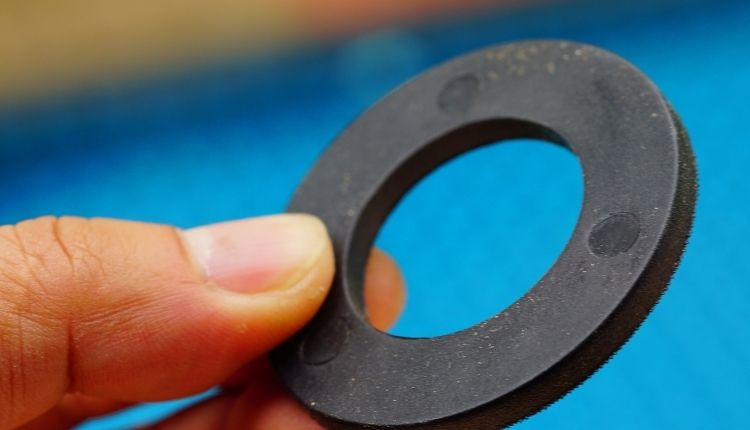
You will find an O-ring at the bottom of the pressure gauge and valve assembly. There is also another O-ring inside the valve. To get to this valve, you need to remove the plate at the bottom. Use needle-nosed pliers and put them in the holes and twist to remove the plate at the bottom. Remove the plate to access the spring and valve bit with the O-ring. Check thoroughly the O-ring whether it is cracked, worn, or damaged. A worn O-ring lead to air leakage.
Step Six: Clean The Dirt
Remember when you fill the air with the pump rather than the tank dirt and grime may go inside the gun. To clean the dirt and grime take an earbud and clean inside as much as possible.
Step Seven: Replace the O-ring
Change the O-rings on the pressure gauge and valve bit. Reattach the base plate once the O-rings are replaced, and screw the pressure gauge tightly into the cylinder. Put the covers over the pressure gauge back on.
Step Eight: Re-Check If All Was Correct
It’s good to re-check the tightness of everything after performing the piece of replacement. To check the leaking problem fix repeat the balloon air leak test to check if there is an air leak. Reattach the cylinder into the gun and fill it up to 300 bars. Check the gauge to see if the pressure is holding.
Tips To Remember During The Whole Air Rifle Leak Fixing Process
Do Not Leave Water Inside The Gun:
If you use water to check for air leaks, it is crucial to ensure no water is left inside the gun. An air hose or any other type of forced air will be perfect for drying it. Alternatively, you can dry fire the rifle several times to dry out the water in the barrel.
If you are using a CO2 Air Rifle, firing a Crosman pellgunoil CO2 cartridge will be a good way to complete the after-test maintenance.
Ask Help From Gunsmith:
If you are having trouble fixing your air rifle, it might be a good idea to get help from a gunsmith. A qualified individual will have the necessary tools and knowledge to fix the leak and prevent future problems.
Never Too Extra
Do not over tighten screws or bolts – this can cause further damage and/or leaks.
Other Tips
- Always have a repair kit on hand in case of an air rifle leak. This includes rubber seals, nubber plugs, and patch kits.
- Make sure the area you are working on is clean and free from any debris or oils that could potentially cause damage to your equipment.
Frequently Asked Questions
Why is my air gun leaking?
A common cause of air gun leaks is using a pump to fill up the rifle rather than a tank. This damages the valves inside the pressure gauge, causing leaks. Also, the seal becomes weak after a certain period by the Air gun cartridge resulting in a leak. Another reason could be that the dirt and grime can distort the air-tight seal, resulting in a compromised seal and starting air leak.
Why is my cO2 gun leaking?
Truth is, all CO2 powered guns leak at some point. The main cause is usually the seal you place the gas canister in. The cartridge deforms the seal over time, and this causes the air to leak.
About The Author:
Lake Streeter, A Gun enthusiast, and loves to hunt in the middle of the wood. Always check the latest hunting gears out in the market and try to share his honest opinion with the audience in Hunting Nook.